Getting Started With the Editor
This guide is a tour of the Untold Editor itself — launching it, the main panels, navigating the viewport, and selecting and manipulating entities. It doesn't create a project or write any code; for that, see Getting Started Making Games — Editor.
1. Download and launch
Grab the latest build from the Untold Editor Releases page and launch it.
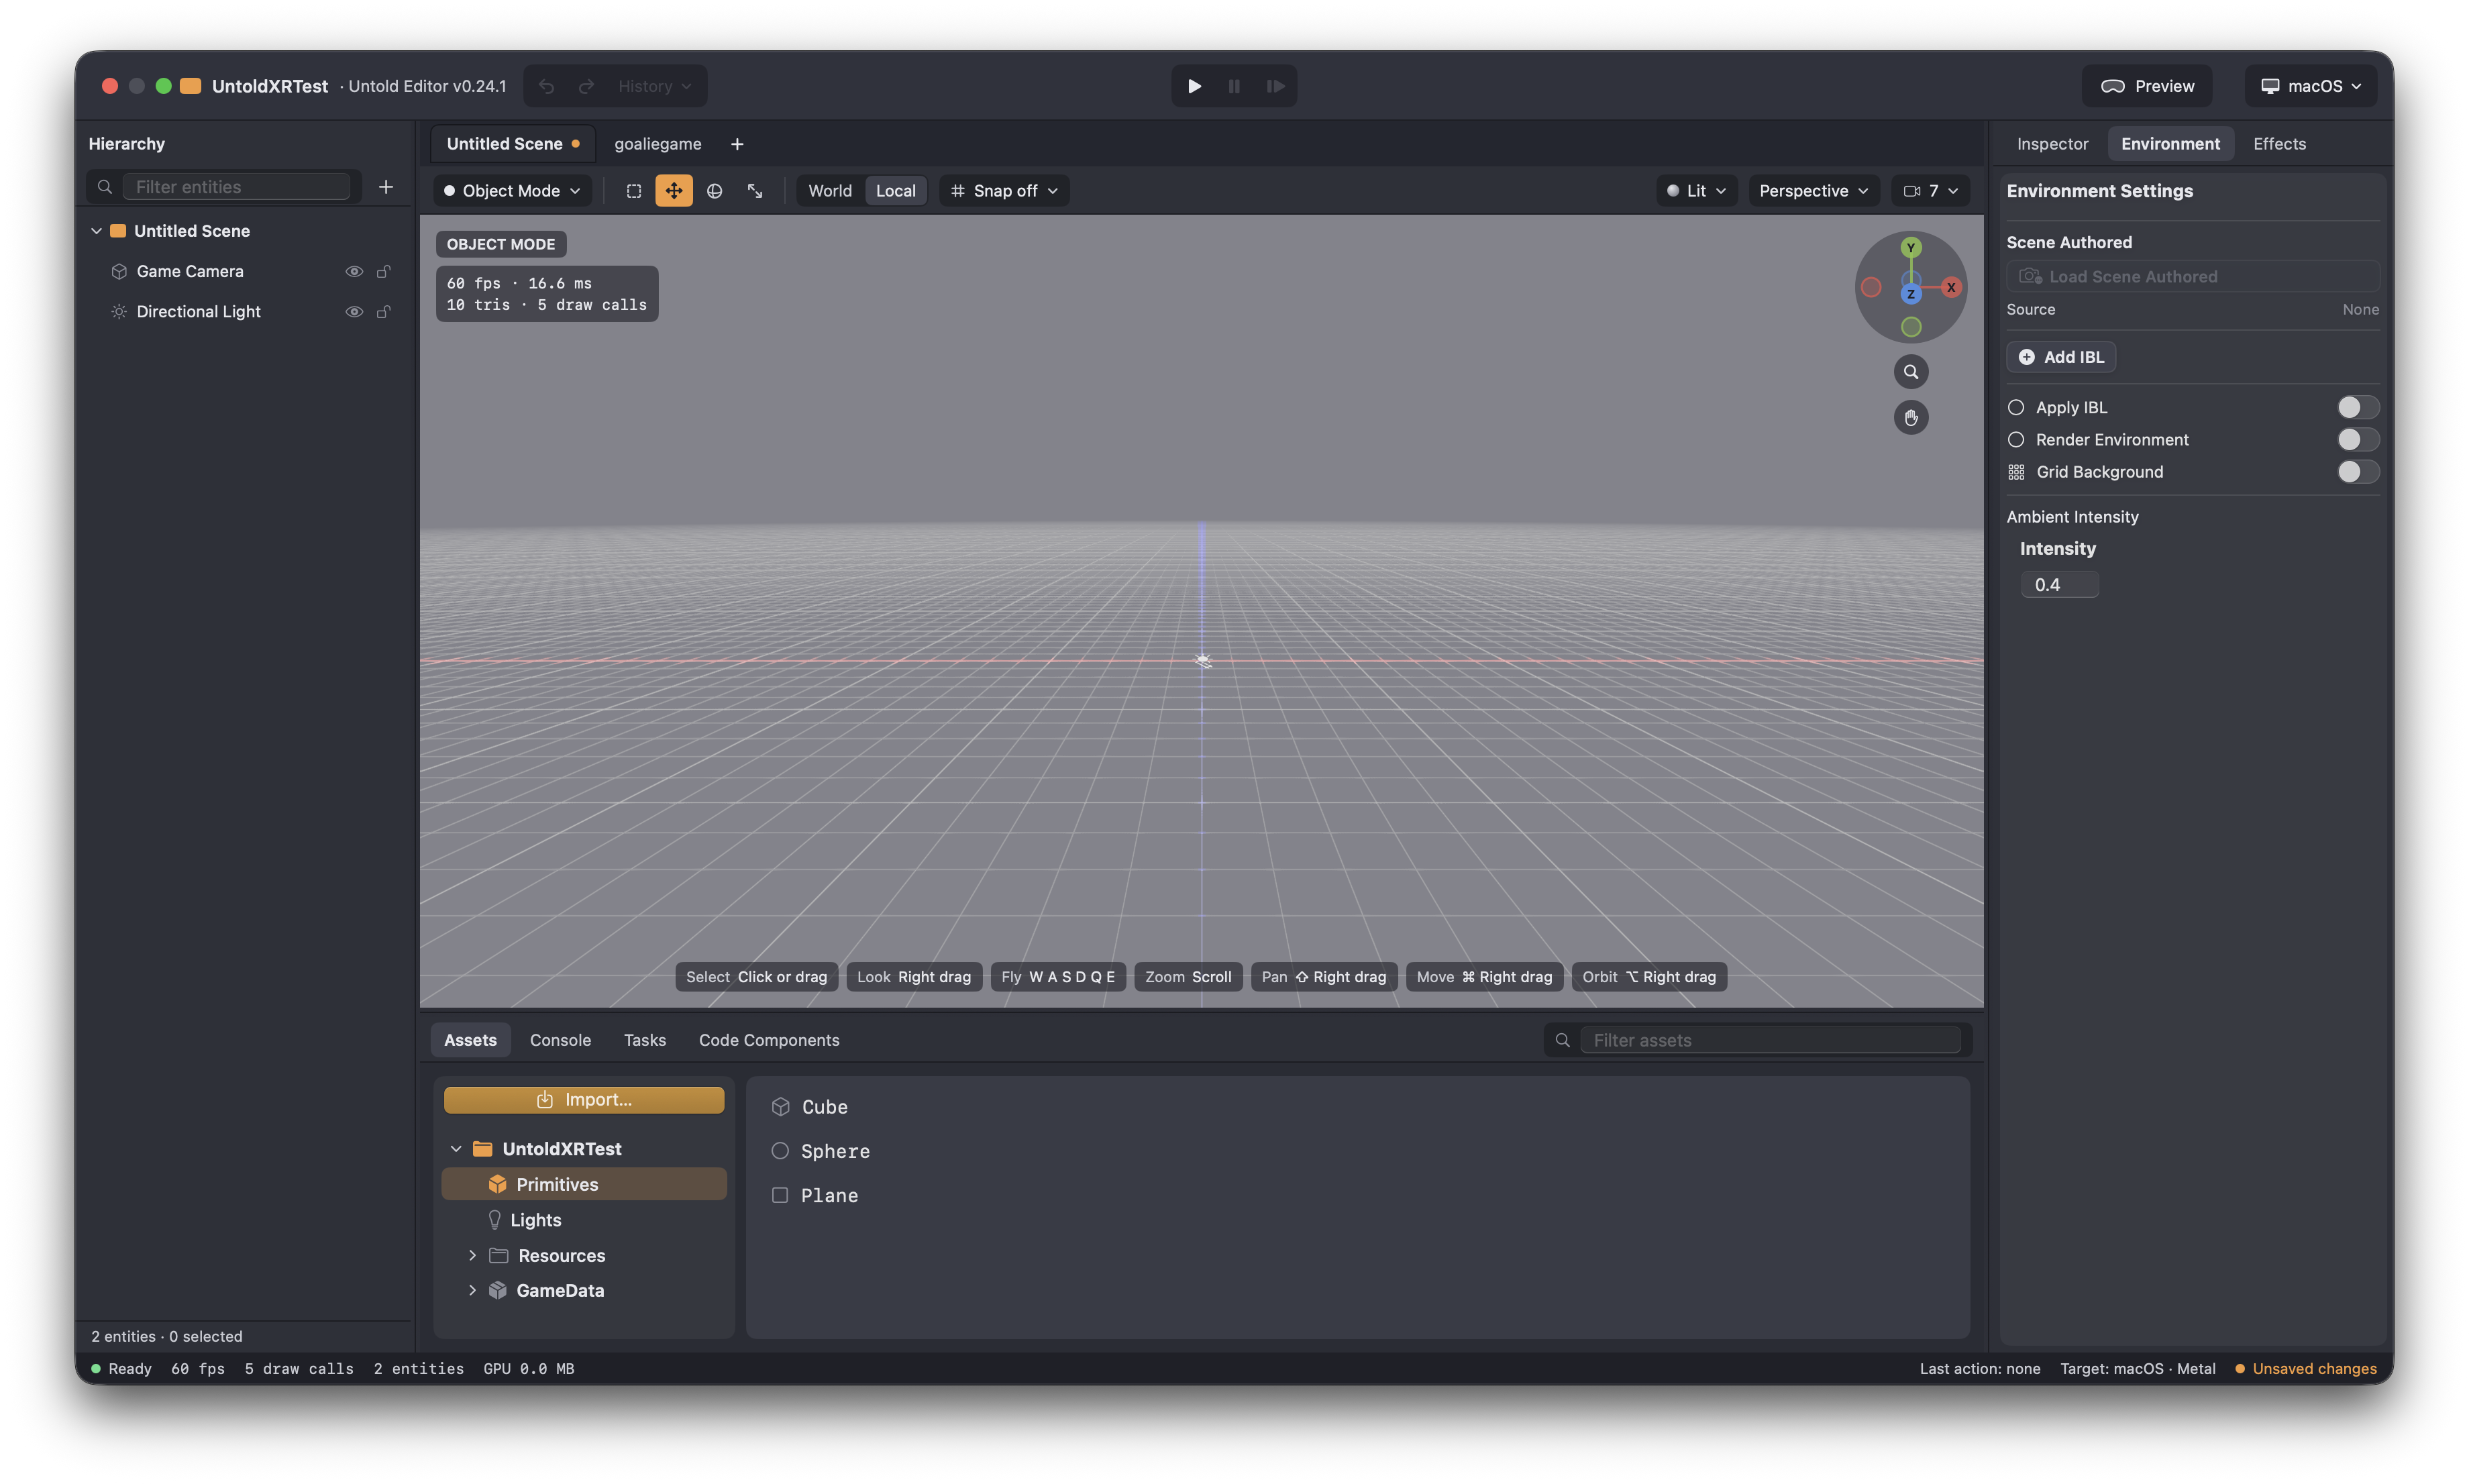
2. The main panels
The Editor window is made of dockable panels around a fixed center Viewport:
| Panel | What it's for |
|---|---|
| Viewport | The 3D scene view. Always open, always centered. |
| Hierarchy | The scene graph — every entity and its parent/child relationships. Click an entity here to select it. |
| Inspector | The components and properties of whatever is currently selected — transform, mesh, material, lights, and so on. |
| Assets | The Asset Browser — models, textures, primitives (Cube, Sphere, Plane, lights), and other project assets you can place into the scene. |
| Environment | IBL, skybox, and environment lighting settings for the scene. |
| Effects | Post-processing settings — color grading, bloom, SSAO, anti-aliasing, and other render passes. |
| Console | Engine log output. |
| Tasks | Progress of in-flight background work, such as project builds or asset imports. |
| Code Components | Scripting/code-component authoring, when enabled. |
Panels can be dragged to dock on the left, right, or bottom of the window, resized, or closed (every panel except the Viewport can close).
3. Navigating the viewport
The Editor supports two camera navigation styles, set in the Editor's preferences:
- Classic — the scroll wheel (or pinch) zooms.
- Blender — scrolling orbits, ⇧-scroll pans, ⌘-scroll zooms.
In both styles, a right-click drag on the viewport steers the camera the same way:
| Modifier held | Right-drag does |
|---|---|
| (none) | Look around, the way a mouse look works in a game |
| ⇧ Shift | Pan — slide the camera along the view plane |
| ⌘ Command | Move the camera forward and back |
| ⌥ Option | Orbit around the point ahead of the camera |
4. Selecting and placing entities
Select an entity either by clicking it directly in the Viewport or by clicking its row in the Hierarchy panel. The Inspector panel updates to show the selected entity's components and properties.
To place something new, open the Assets panel and either double-click or drag a row — a primitive (Cube, Sphere, Plane), a light, or an imported model — into the Viewport.
5. Importing and cooking your own assets
The Asset Browser's GameData/ tree is for cooked, ready-to-run assets
only — .untold models, .untoldanim clips, and tiled stream models. It
doesn't accept .blend, USD, .ply, or .spz files directly. Those go
through a separate Resources/ folder first.
Select the Resources folder in the Asset Browser, then right-click the
empty area and choose Import to bring a source file in. Accepted source
types: .blend, .usd/.usda/.usdc/.usdz, .ply, and .spz. The
source file stays in Resources/ so you can cook it again later with
different options.
Once a source is in Resources/, right-click it to cook it into a runtime
asset. The menu options depend on the file type:
.blend/ USD files — Cook to .untold (Model)…, Cook to .untoldanim (Animation)…, or Cook to Tiled Stream Model….ply/.spzGaussian splat captures — Cook to .untoldgs…
Each option opens a sheet where you can set options (orientation conversion,
hidden objects, LOD chains, and so on) before cooking. The result lands under
GameData/Models/, GameData/Animations/, or GameData/StreamModels/
depending on what you cooked it as — GameData only ever holds the cooked,
ready-to-run output, never the source.
If you already have a cooked .untold/.untoldanim/.untoldgs file from
somewhere else (the CLI exporter, for example), use Import directly on
the matching GameData/ folder instead of cooking it again.
6. Moving, rotating, and scaling a selection
With an entity selected, use the transform toolbar above the Viewport to pick a gizmo mode:
- Translate — drag an axis handle to move the entity.
- Rotate — drag a ring to rotate around an axis.
- Scale — drag a handle to scale along an axis.
Clicking the active mode's button again turns the gizmo off.
7. Saving your work
Save the current scene with Cmd+S. The first save for a new scene prompts
for a name and writes a .untoldscene file into the project's
GameData/Scenes/ folder.
Where to go next
- Getting Started Making Games — Editor — create a project, place a cube, and reference it in code
- Building Your First Vision Pro Scene — load a real exported model, configure XR input, and stream large scenes
- Using The Exporter — the same
.blend/USD →.untoldconversion from the command line, with the full flag reference